This week the framing crew put some skin on the Control Room roof rafters, and we’re now technically dried in!
But that’s not nearly all that’s happened, and of course the journey of how we got here is interesting in its own right.
The journey begins, obviously enough, with the placement of plywood on the rafters:
Some sheets go up (and remain) square. Others need to be fit to the corners they fill:
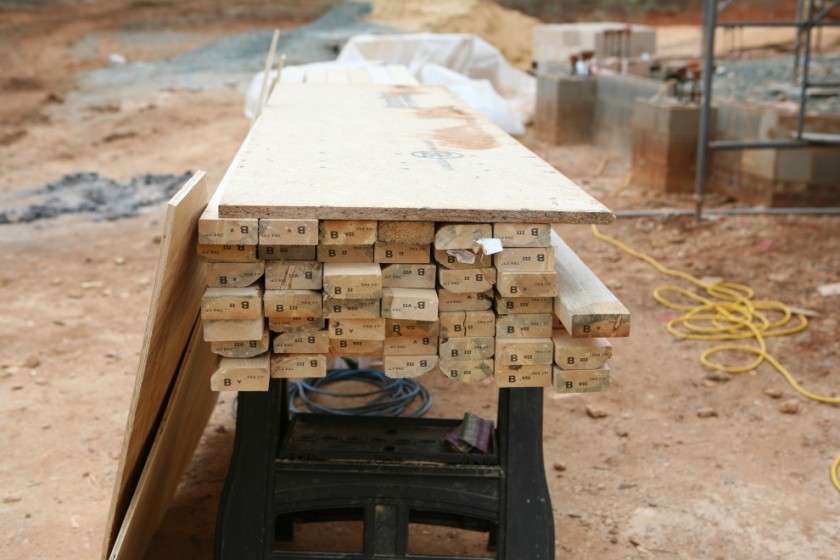
Though the roof already looks well-covered, it’s mostly only the first layer of plywood that is down. The plywood is installed in two layers, both for strength and because by staggering the plywood seams, we get a nice and water-proof seal. Here’s the to-do pile of plywood on the West side (there’s a similarly-sized pile on the East side):
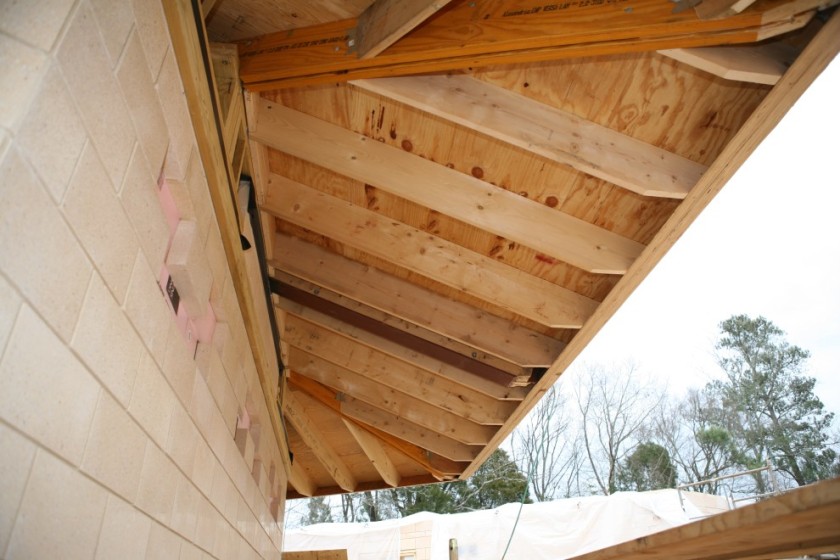
Here’s the very unfinished underside of the long overhang South of the Control Room:
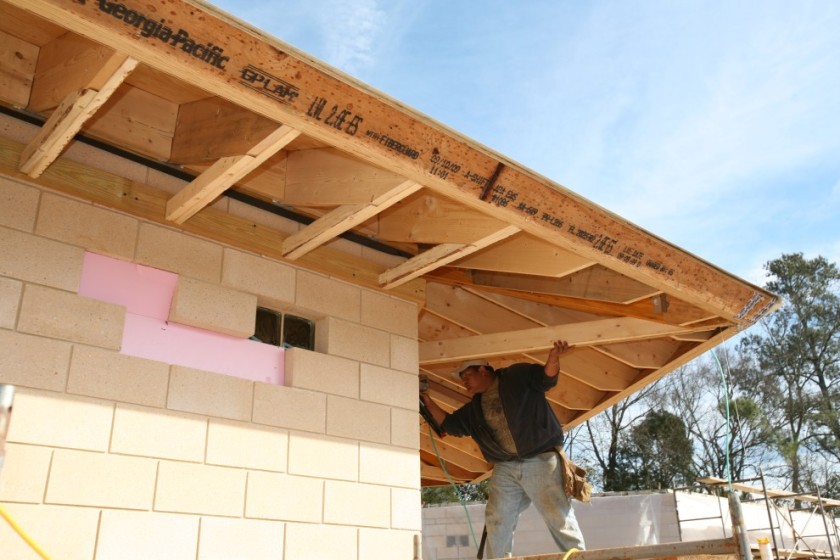
Along the hip rafter dimension, the overhang is 8′, which may not sound like much, but think about holding up the weight of a roof, not at arm’s length, not across a typical framing span of 16″ centers or 24″ centers, but at a length of 8′. That’s a lot of torque! As explained in last week’s posting, the primary strength of the hips come from a pair of 2×12 LVLs with a 5/8″-thick steel flitch beam between them. But this will further be reinforced by the installation of lookouts, gussets, and, ultimately, the soffit boards. Here’s a lookout going in (three 2×6 beams that are sistered together):
Smaller lookouts for the more conventional three-and-a-half foot overhang are made from a pair of sistered 2x4s:
Yes it’s ugly and marginal wood, but it’s “good enough”. Quite a bit of “barking” on these boards, but they will do the job (which is all we need):
I can assure you that the money we didn’t spend getting furniture-grade 2x4s for this purpose is being well-spent on other, more important structural and finish elements.
Now for a quick tour of what things look like inside our newly-covered control room. For one thing, it’s dark! Up until this point I’ve avoided using a flash, even when it would have helped my outdoor photos (by reducing excessive contrast). I’m now changing modes, and from here on out there’s a flash on the camera all the time, although I don’t use it all the time. But if you are an astute observer, you’ll have noticed already that there’s something different about the pictures taken above—I’m using a flash! Anyway, here are those control room photos:
You can see light coming from the eQuipment Room (which we call the QR), indicating that the roof has not been covered in there yet:
Indeed, not even the sub-fascia is up yet! Here’s a detail that makes it really clear how the two layers of plywood are overlapping:
Nevertheless, it came to pass that we were able to put “titanium wrap” over the finished part of the roof, and from this side the South roof and the North roof now match:
Now to switch gears just a bit, the Annex masonry really, really finished this week. Two weeks ago I gave a fairly strong impression that such progress was so imminent that it might actually have been finished by the time you read my blog posting. Alas, the weather was so cold that shortly after I received the communication that the masons intended to finish the job over New Year’s, they made the decision to not risk quality for schedule. With temperatures below 25°F for several days, it was simply too cold to make an optimal bond beam.
This week finally brought relief from that record cold snap, and so the masons could finally finish the bond beam. Here they are working the Southeast wall:
And from another perspective:
And while looking from that perspective, why not check out the finish trim of the Music Room windows?
In Michael Pollan’s book A Place of My Own, there was a point where the whole project turned on the question of whether a suitable window sill could be designed that would satisfy both the architect who designed Pollan’s writer’s shed and the carpenter capable of actually building the windows specified in the design. Indeed, it was the most suspenseful part of the book! Happily there was no conflict at all when, despite an overhang of more than 5′ (for a sill only 4′ below the overhang), and despite being inoperable windows (compared with Pollan’s operable window), the carpentry crew supervisor proposed building a slanted sill instead of the square sill shown in the drawings. Here’s the sill that was built:
And a closeup:
I think there’s still some caulking to do, but I think we won’t have to worry about water sitting and destroying our windows and our building.
Here’s what things look like at the top corners:
And here’s a view of the B&B through the mitered window:
The remainder of the progress is “more of the same” when it comes to finishing up the lookouts. The west side has been finished, but the east side is not yet started. There is one interesting configuration at the south end that was finished this week, and so I’ll leave you with this image. Because of the length of the hip rafter, some of the lookouts actually terminate into the hip rather than into the wall plate:
And for those wondering “what’s that thing in the background, way up in the tree?”, I initially thought it was an eagle’s nest (we do have a good eagle population here), but somebody from the area pointed out that most of the eagles nest within view of Jordan Lake, about 1.5 miles away. This nest is therefore most likely used by red-tailed hawks, also a prevalent predator in the area.
I’m excited to see what next week will bring!


One thought on “Week 106 (Control Room dried in)”