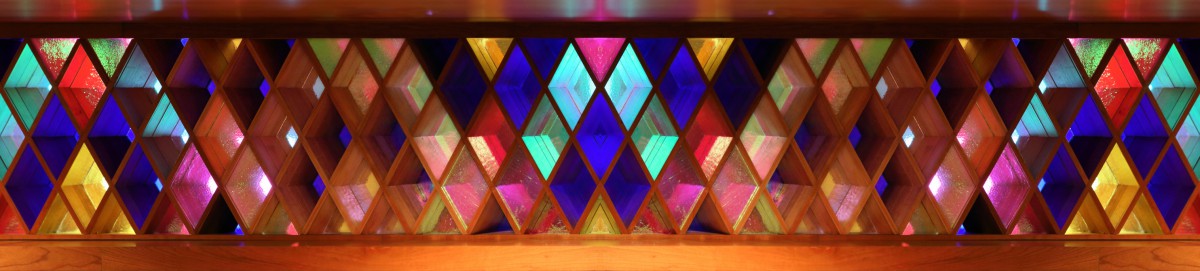
There are many facets to this studio construction project, and all are important, but one small one that’s always been a special milestone to me has been the installation of the glass block in the control room. That happened this week…

But let’s start from the beginning of the week and then I’ll come back to explain what the above photo shows…
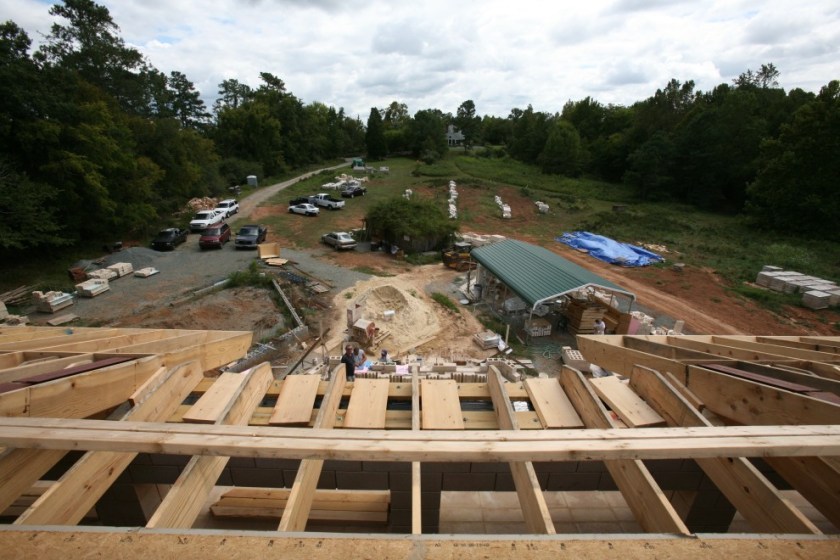
From previous postings [1], [2], [3] you know that there’s been a lot of activity up on the roof. This week we feature some details on just what has been going on. Let’s begin with some perspective…this is the view from the roof looking South across the site:
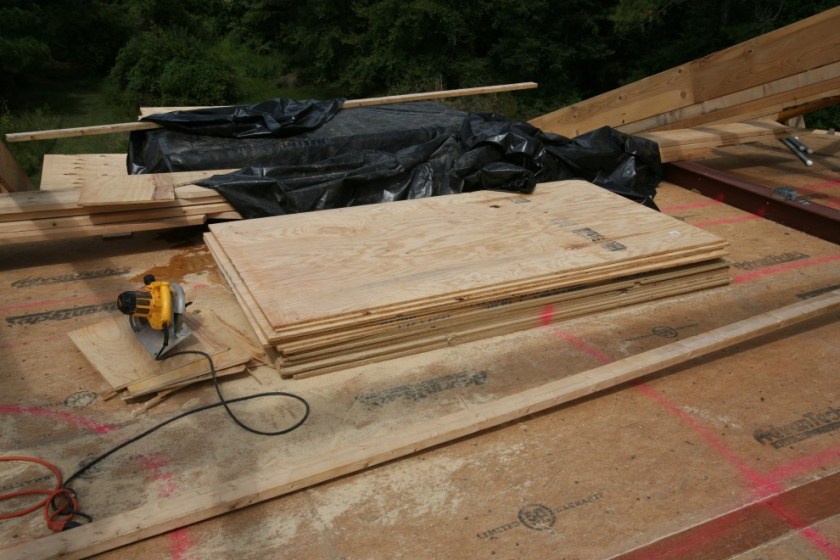
Using plywood from this pile, the gap you see between the top of the ceiling and the walls gets smaller every day:
Above the ceiling will be our air-handling system. The following series of photos shows some of the outlines of where the ducts will be:


The air handlers are going to need power, as will the many lights that will suspend one way or another from the ceiling. Here are the junction boxes that will provide that power. Note how the boxes are tucked into the spaces between the planned ductwork:

I’ve already mentioned that there’s a whole vocabulary of terms taking shape up on the roof. How many carpentry terms do you see represented here?

Or here:

Now let’s go back down, pausing for a moment to enjoy the view through one of the clerestory windows:

And now, the star of this week’s webisode, the 8x8x3 inch glass block:

And here are the voids into which it will be placed:

For installation, the glass block is covered with painter’s (low-tack) tape on both sides, placed on spacers, and then the mortar is pointed in. The glass block is offset 4″ from the face of the wythe, and that is controlled by a precisely cut board, as you can see in this image:
Almost all of the glass block have been installed:

And the few blocks that remain will be installed by the end of the day:

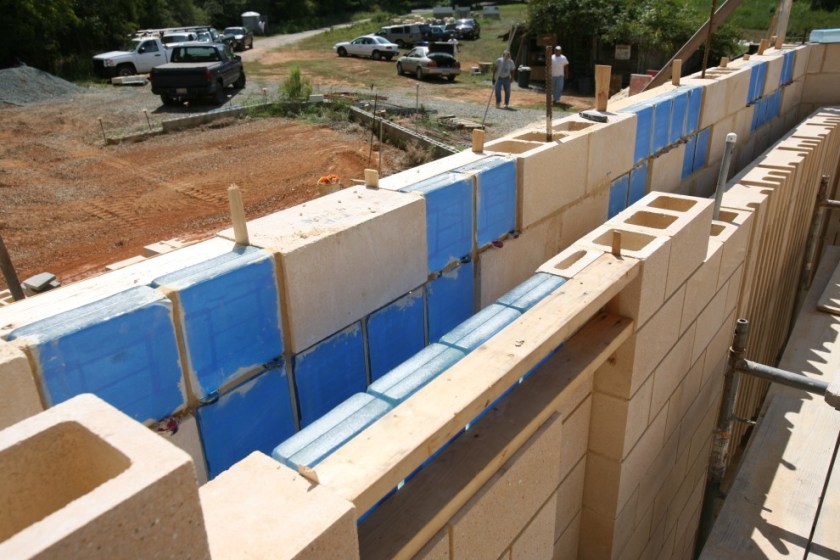
Across the top of all the glass block will run some more bond beams. Here are the many, many blocks that had to be custom cut to give us yet another 50+ linear feet of bond beam:

And while the focus is on the finishing up the glass block work, another wall begins to rise…that of the eQuipment Room:

We really need good weather next week so we can get all the duct work done and start to close up the roof. The risk right now is that our ceiling turns into a sponge, and we don’t want that!

![[1]](https://blog.miraverse.com/wp-content/uploads/2009/09/crglassblockvoids3.jpg)
![[2]](https://blog.miraverse.com/wp-content/uploads/2009/08/rpg-trapwall3.jpg)
![[3]](https://blog.miraverse.com/wp-content/uploads/2009/08/crqrdcourse63.jpg)